Thursday, February 13, 2014

DIY: How To Make Old Wood Drawers Slide Easier

THE RAVENNA HOUSE
Hi Guys - Well after a long and grueling Sunday of peeling blue tape off the roll and laying down plastic I have learned the meaning of prep.  And oh how I've grown to hate that word.  Prep.  Eeerrrr.  See, after a weekend of prepping the upstairs for paint, we didn't even make it to the painting part.  So the Ravenna House is covered in a shroud of plastic.  And no paint. Not exactly the makings of beautiful painted wall pictures I was hoping to share with you today. 
 
Here's a progress shot of the window masking:


Yeah.  Anyway.  Let's move on.  I'll tell you all about the prep and the pain(t) sprayer another day when the words blue-tape and plastic don't make me grind my teeth.  
 
So let's talk drawers.  All-wood. Easy-gliding. Smooth. Wonderful. Joyful drawers.  See I've been doing a lot of thinking lately about dressers and built-in-drawers of a certain age.  We've got a lot of those around here.  They look really nice.  And they are solid.  Plus they've lasted 80+ years so I know they're well made.  But they are a real b^#*$ to open. They stick.  They grind. They take two strong hands to open.  Of course I can't get rid of them or replace them with some cheap crap.  Cause that would be wrong.  That would cut me straight to the soul.  
 
So, what to do.  
 
Well it turns out that there's an easy fix.  My years of frustration and ground teeth were all for not.  It could have been fixed with $0.90 and a trip to the drug store.  Let's consider this my first DIY on the Grit and Polish blog.  Here I'll make it official:
 
DIY: How To Make Old Wood Drawers Slide Easier
 
Cool. Ready? 
 
For this DIY, I'm taking you over to The Bryant House. That's where we live now. It's a 1920 craftsman that has 2 bedrooms, a renovated bath and kitchen, and just 790sf of finished space.  Yeah, try fitting two full-grown-adults, an energetic 65-pound dog, and a baby plus their swings, bikes, and toys in 790sf! But that's another post entirely.  Back to the drawers...
 

Step 1: Roll up your sleeves.  What's that? You've got a baby tugging on your pant legs too? Well put him in the jumping johny.  Maybe toss a binky in there.  Okay, now roll up your sleeves.
We've got this. 
 
Step 2: Pull out your drawers and arrange them so you can access the underside. 
 
 
Now grab a bar of soap.  I used a classic bar of Ivory, because that's just the kind of family we are.  But really any bar of soap will do.
 
 
Step 3: Rub said bar of soap across all wood sliding surfaces on the drawers and in the cabinet/dresser.  Don't be shy - give it a good, strong rub.  This is one of those more is better situations.
 
Okay, that's it!  Slide the drawer back into place and pick up the baby. We're done!
 
That wasn't so bad, right?  Give those drawers a try.  Better, right?  Yeah they're not brand-new soft-close drawers, but they're better, right!  And for $0.90 and 5 minutes, I'd say that's pretty darn great!
 
What's that?  You like the drawer hardware.  It's a Martha Stewart classic and you can find it at your local Home Depot (here).
 
It's a good thing I came across this solution (from The Farmers Nest here) when I did because I've got a lot more sticky drawers in my future. 
 
 
Did you catch that?  Yeah, it's a new dresser that I picked up on Craigslist for Wilder's new nursery. Lot's of soon-to-be-smooth drawers in this piece.  What's that?  Oh you think she's kinda dingy?  Well just hold on a sec (read: couple months).  Not sure if I'm going to paint her or give her a new coat of stain, but she'll be looking lovely before you know it!
 
xoxo
 
p.s. It's been electronic anarchy around this household.  First our MacBook Air crapped out (she's still in the shop), then I dropped my iPhone into the toilet.  Before I flushed.  Too much information?  Yeah, I thought so.  Anyway, no phone for a week.
 
p.p.s. I'm secretly digging the way the blue tape and plastic looks in the windows.  So graphic and ethereal.  Of course I'll be digging a fresh coat of paint even more...

Thursday, February 6, 2014

The Case for Marble

THE RAVENNA HOUSE

Hi guys.  Well it's time I came clean.  As I hinted a couple weeks ago, I did something that I said I wouldn't do.  Many people will think I'm crazy.  Heck, you may think I'm crazy.   But it's done.  And this thing - the thing that I said I wouldn't do - is cut, polished, and glued in place.  Permanently.  


The Ravenna House | Kitchen Progress

That's right.  I am now the proud owner of marble countertops!  Hooray!


So I am obviously super excited, but not everyone is going to that way.  Some people's crazy sensors are probably going off right about now.  See marble is a controversial choice in the world of kitchen countertops.  It's pourous.  It stains.  It etches.  It's soft.  And it needs maintenance.  So why would I use it?  Well let's back up.  Let me make my case for marble...


Pilar Guzman's Kitchen | Designed by Tyler Hays

Deciding Factor number one: they are beautiful! Okay, so everyone knows that. Or at least I think everyone does (could it be possible that people have different taste than me...unlikely!).  I've never liked a countertop surface as much as marble and I doubt I ever will (case in point, this awesome kitchen island in Brooklyn).  I am going to be thrilled - no ecstatic - to walk into my kitchen and see these countertops. Every. Single. Day.


Faith's Kitchen | Marble Island

Deciding factor number two: marble is a historic material.  I love to use materials that were used in the same time period as when the house was built.  And marble fits the bill.  Combine this with deciding factor number one and we have a winner!  


Emily's Granite Island | Cupcakes and Cashmere

Deciding factor number three: I don't like the alternatives as much as the real deal.  There are tons of Carrara-marble-look-alikes on the market today - mainly quartz and granite - but they lack that certain je na sais quoi of marble.  Okay, so they're more durable.  And less prone to staining, etching, and scratching.  But, they also tend to feel cold or have a "man-made" quality or be too dark or too light.  So while they look nice and work well in plenty of very stunning kitchens around this country (most notably Emily's beautiful granite island), they aren't for me.  At least not now.  I am prepared to eat my words if I find our marble countertops too high-maintenance in the future.  (See why designer Amber Lewis recommends against marble here).


Joan's Kitchen | For the Love of a House

Deciding factor number four: I like a little patina.  Yes, marble countertops will show some wear in the form of staining, etching, and scratches/chips. But it really doesn't bother me.  In fact, I like patina.  I'm a sucker for the antique.  The old.  The historic.  I love age and all the wear and stories that comes with it.  So I don't think I'll mind the patina.  Here are some other people wearing-in marble (and loving the patina) as we speak...


Martha Stewart's Kitchen | Designed by Beth Weinstein

Deciding factor number five: I really wanted marble.  Ultimately that was it. I couldn't talk myself out of it no matter how much research I did.  In the end, I was going to be disappointed if we went with anything else.   So that was that.  

Am I crazy?  Maybe.  Mmmmmm....okay, probably.  

But who cares.  Because I am one excited home owner.  Do you have marble in the kitchen or are you thinking about getting it?  I'd love to hear about it!

xoxo

p.s. I am back in Seattle.  Missing the 70 degrees of Arizona.  

p.p.s. I am dying to do a big kitchen reveal.  But first we need to finish the kitchen...  Painting is up next.  And then tiling the backsplash.  And finally installing the appliances and refinishing the hardwood floors.  

Monday, January 27, 2014

January: By the Numbers

THE RAVENNA HOUSE

Hi guys! Well we made it to the end of January and it's been a busy month.

January marks 4 tons of concrete poured in the basement, 5 inspections passed, 1 tile saw purchased,  1100 feet of electrical wire installed, 8 plumbing fixtures roughed in, 6 cabinets in the kitchen, 4 teeth for baby Wilder, and 2 nights in the dogspital for Bubba (poor guy). Plus Garrett and I made it to our first movie date since I was pregnant and I flew to Arizona with Wilder to meet his brand new cousin.  In fact I'm posting this from sunny Phoenix. It's 75 degrees!  Not too shabby.   

Here are the pics:


Photo 1: Upstairs bathroom floor progress (eeeech!)
Photo 2: Upstairs bathroom progress
Photo 3: Upstairs bedroom
Photo 4: Kitchen progress
Photo 5: Buba beauty shot (and Garrett working behind him)
Photo 6: Kitchen pre-cabinet progress
Photo 7: Kitchen window with base cabinet and bench installed
Photo 8: Furnace install
Photo 9: Electrical Panel

Phew! A pretty eventful month.  But don't worry, there's much more to come in February...

I'll delve deeper into these spaces as we get farther along.  But for now, these photos give you a good idea of what the Ravenna House looks like!

xoxo

p.s. why don't we live somewhere warmer...?!

Thursday, January 23, 2014

A Lesson in Procrastination

THE RAVENNA HOUSE

Hi All!  Well I learned an important lesson this week.  

When you design a kitchen around a certain sink, buy that sink right away. Just do it. Immediately.  Because if you sit on your laurels and twiddle your thumbs, when you finally do get around to buying that sink, it may just be out of stock.  

I'm just saying.  

At the Ravenna House we planned on using Ikea's Domsjo single-bowl, apron-front sink in the kitchen (here).  It's cheap, classic, and deep as an ocean. And just like we did at our Bryant House, we were going to undermount it.  Like so:


Undermount Domsjo Sink | The Bryant House

It took a little brain power to design the sink base cabinet at the Bryant House.  There were a couple good tutorials on the web (I checked out what Jessie and Rick did here.)  And this is the detail of the sink base cabinet we developed:


The Domsjo is only $189.  It's a good $200 cheaper than any other apron-front sink I have found, so it was worth the effort of a custom cabinet.  So when we it came to designing the kitchen at the Ravenna House, there was no question, we were going to use the same sink.  I had a carpenter build the same cabinet and then we painted it and installed it.  But I didn't pick up the sink right away.  Not sure why.  I just didn't.  And what do you know, when I finally checked last week, Ikea is out of stock.  And they had no idea when they'd get in more.

So, what next?

I freaked out!  

But only for a second.  Because what is a renovation really without problems? Kinda boring.  So I pulled it together and looked on Amazon and found a lovely, in-stock, undermount, apron-front sink that will be at our house on Wednesday (here).    

And although it's an inch shorter than the Ikea sink, we should...no we WILL be able to make it fit.  Have faith, people!  It will be lovely

So what's the lesson?  Don't wait or it will cost you $200.  Bam!  Whoever said good-things-come-to-those-who-wait were clearly misguided.  

Has something like this ever happened to you?  Come on, I can't be the only one!  

xoxo

p.s. I watched this awesome 12-minute Ted Talk on happiness and work this week (here).  Thanks for tweeting it, Ivanka Trump.  Kinda random, I know, but it's so awesome I had to share!

p.p.s. I bought something for the kitchen that I said I wouldn't.  It's white, gray, and beautiful all over.  Hint, hint...


Thursday, January 16, 2014

We Passed!

THE RAVENNA HOUSE
Hey Guys! Well, we passed.

Plumbing cover inspection. Check.

Electrical service inspection. Check.

Electrical cover inspection. Check, check, check! 

It may not be the Bar Exam but passing is passing and it feels damn good! 

Of course that means no more lazing about the house eating stale fruit cake and watching Juan Pablo (hey, it happens). It's go time! We're on to drywalling in the kitchen, a sink in the bathroom, framing in the basement, and paint in the bedrooms. 

Here are a couple progress shots from this week:


     Photo 1: progress on tiling the upstairs bath
     Photo 2: Prepping the basement bath slab (featuring dear old dad-in-law)
     Photo 3: the basement bath concrete pour and you can just make out electric floor heat (!)
     Photo 4: the basement bath slab poured.

That's all I've got for you right now.  More next week!

Xoxo

p.s. I was serious when I asked for ideas on the wood window in the shower! What do I do with it (besides paint it?!

Thursday, January 9, 2014

Bathroom Update: Pink Tiles No More!

THE RAVENNA HOUSE

Hey guys! I'm happy to report that the pink tiles are gone! Every. Last. Bit. Oh that feels good! 

Here are the progress photos post demo:


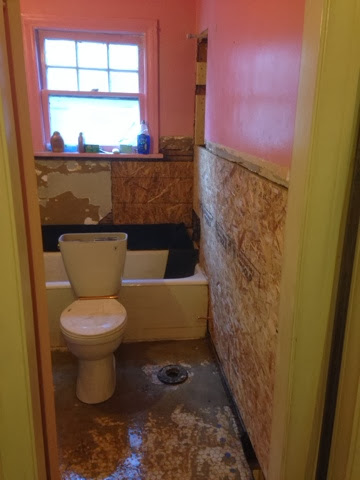
We added 3/4" plywood on the lower half of the walls where we took off the tiles (and lath and plaster - we replaced all the plumbing in the walls) and tile backer around the tub from floor to ceiling. You may have noticed the original wood window in the shower...well that's going to stay since it's the only source of natural light in the room, although I'm not sure how I'll keep water off of it when people actually shower in there. Any ideas? Hubby then covered the plywood with pine wainscott, which will get a nice top rail-shelf (technical term) and a couple coats of Benjamin Moore's Simply White.

But it's not all rainbows and roses in our pink bathroom.  It turns out that removing old lineoleum flooring is a pain in the arse! 


The flooring comes up in a couple different layers: first the plasticky top layer, then the paper-type layer which is held down tight by some glue. And that glue is a real bear! I mean the top layer came up easy enough (albeit slowly) with a scraper and hammer alternated with a multi-tool equipped with a scrapper blade. But the paper/glue combo well that stuff could have held together Jessica Simpson and Nick Lachey. It's that stickey! 


So a few hours of scrapping, a beer, and a sore back later, I gave up. Just like Jessica and Nick. 

At least for now...


Oops how did that sneak in there?!  Pretty cute boys, huh ;)

xoxo

Wednesday, January 1, 2014

Renovation Thoughts for the Holidays

Hi there - so we haven't gotten much done on the house this week since we were out of town spending time with family for the holidays.


Traveling to and from our sleepy hometown, we had lots of time in the car and I got to thinking...

My ideal New Years would be a night with my husband, dry-wallling the kitchen.  

Waste not, want not! I believe in reusing everything you can from an old house, beginning with the house, itself.

If you're going to own one power tool, make it a cordless drill.  I don't care if you're a single gal in an apartment or an avid DIY-er, everyone can use a cordless drill!

And if you're going to own three power tools, make it a cordless drill, a compound miter saw, and a table saw.

There's something magical about old houses - maybe it's the windows and moldings, maybe it's the lives that have been lived in them.

Renovating is more fun with a beer in hand.  I'm not talking a half-rack people...just a beer.  It makes the job feel less like work and more like fun!

When in doubt, shim it.  And then caulk it. 

Always, always, always wear a mask.  Make it a P-100 for particles or an organic vapor respirator for fumes.  Lungs are forever!

And while we're talking about safety, don't forget the ear plugs and safety glasses.  And gloves, good shoes, and thick, long-sleeved clothes.  You seriously can't be too careful!

Baby's aren't baby's for long. Hold them! Snuggle them! Spoil them! And some day they will grow into wonderful hard-working renovators!

I've never regretted choosing a neutral paint color or a classic design.  

and one more...

When choosing a life partner, pick one that knows the back end from the front end of a sawsal. 

Happy New Year!


xoxo